Run a restore test
Launch a restore test from the Cloud-PBS dashboard, read the boot log, screenshot and signed PDF report, and top up your restore-test credits.
Last updated: July 17, 2026
What a restore test does
A restore test proves that a specific backup actually restores and boots. Cloud-PBS restores the selected snapshot onto an isolated Proxmox VE host we provide, strips its network, boots the VM or container, and captures the proof: a screenshot, a boot log, and a signed PDF report. When the test finishes, the temporary guest is torn down automatically.
Each restore test consumes one credit. See Adding credits below if your balance is empty.
Launch a restore test
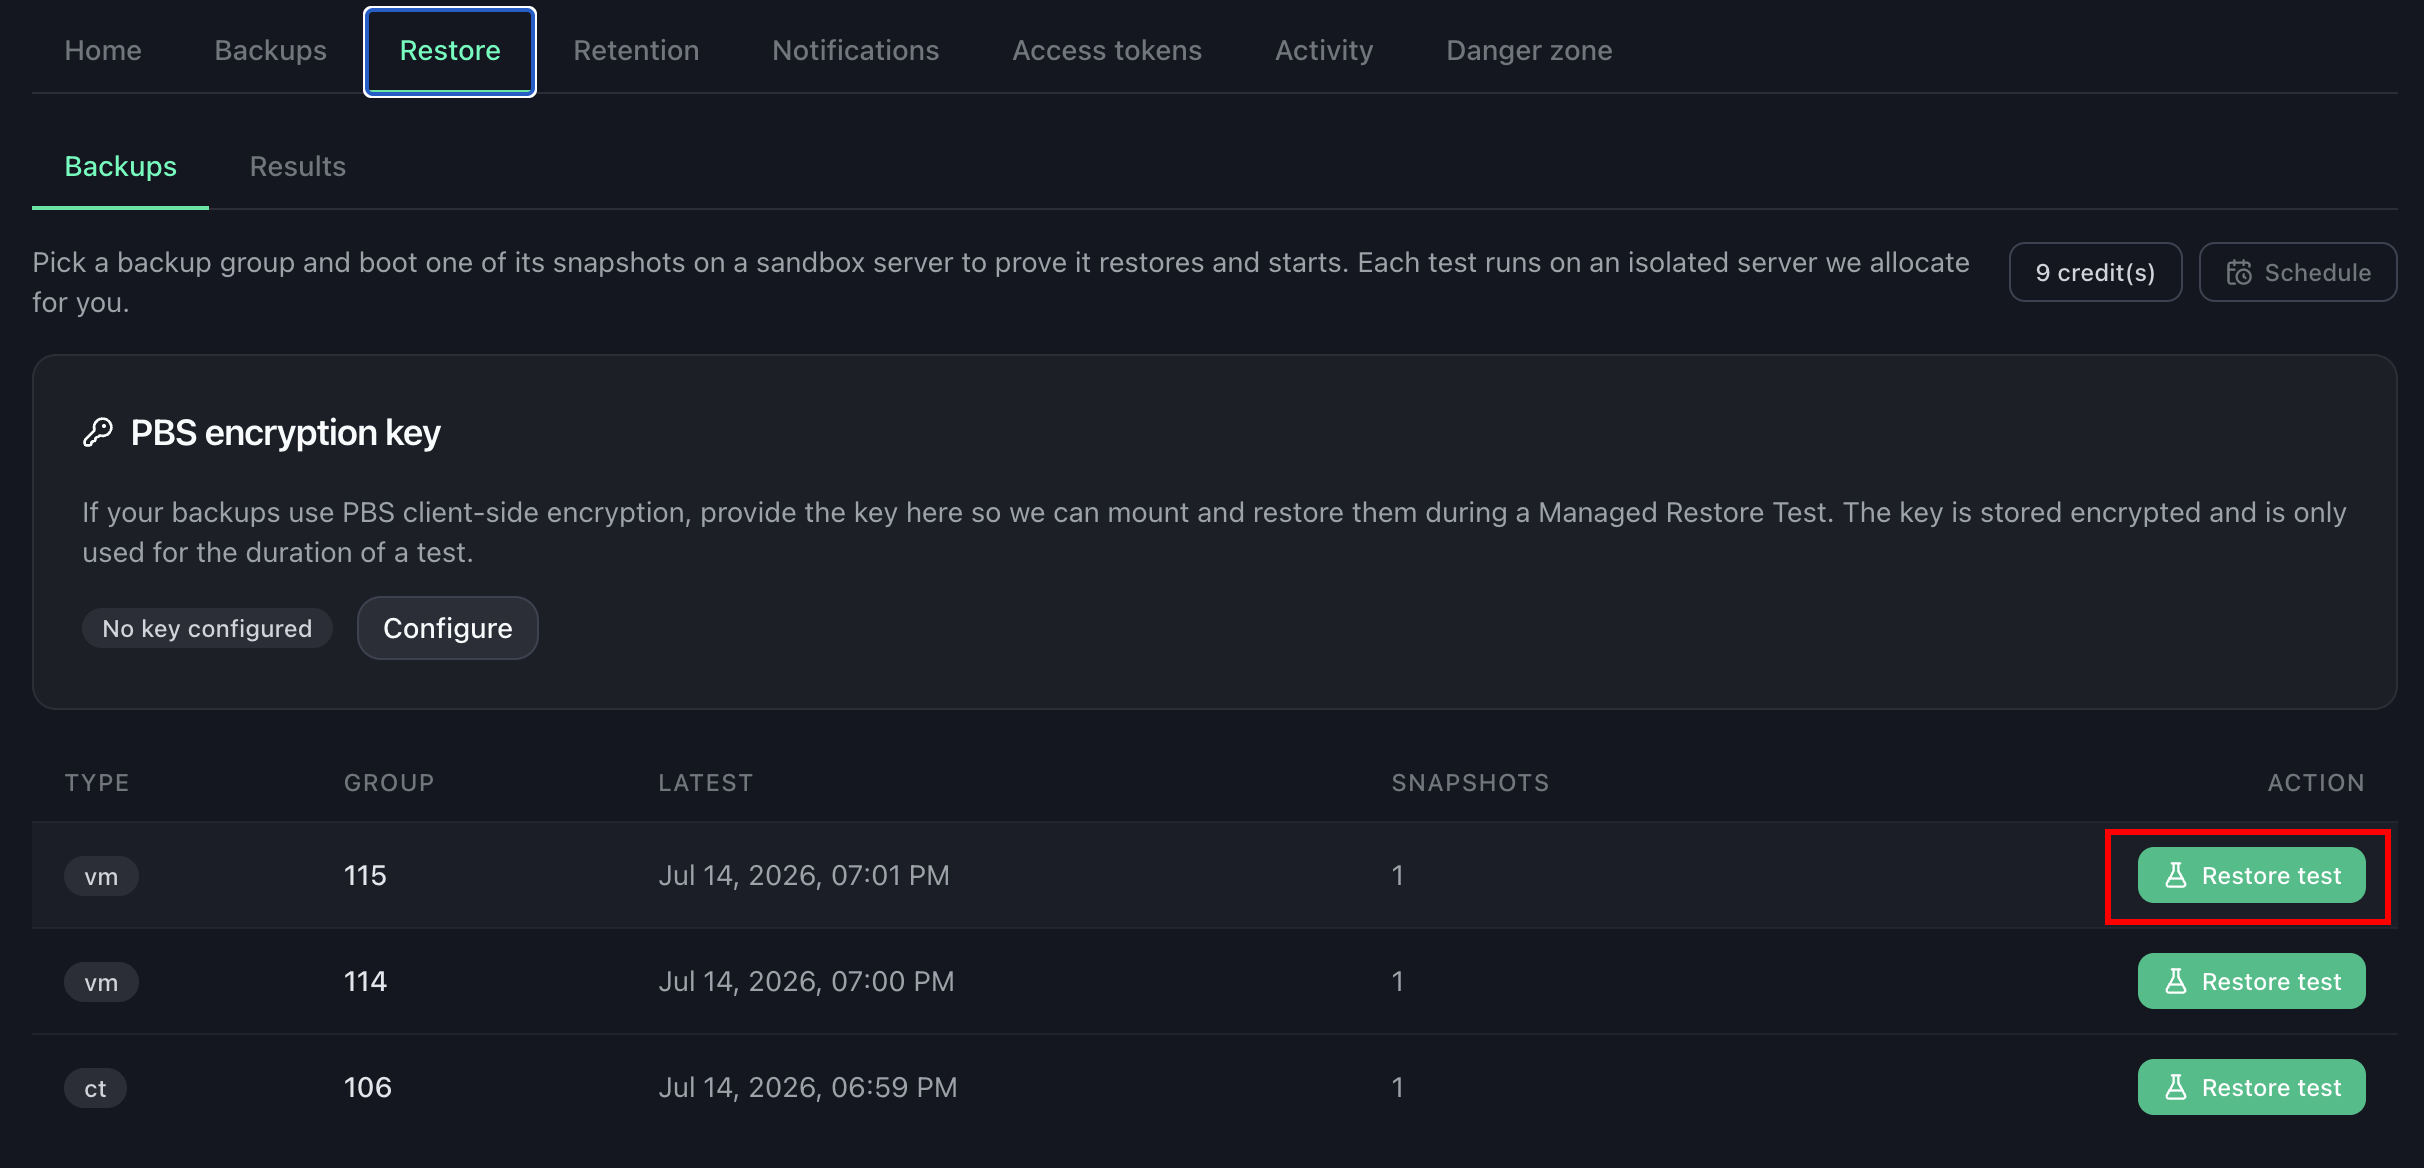
- Open your datastore and go to the Restore tab.
- In the Backups sub-tab, find the backup group (VM or container) you want to test and click Restore test.
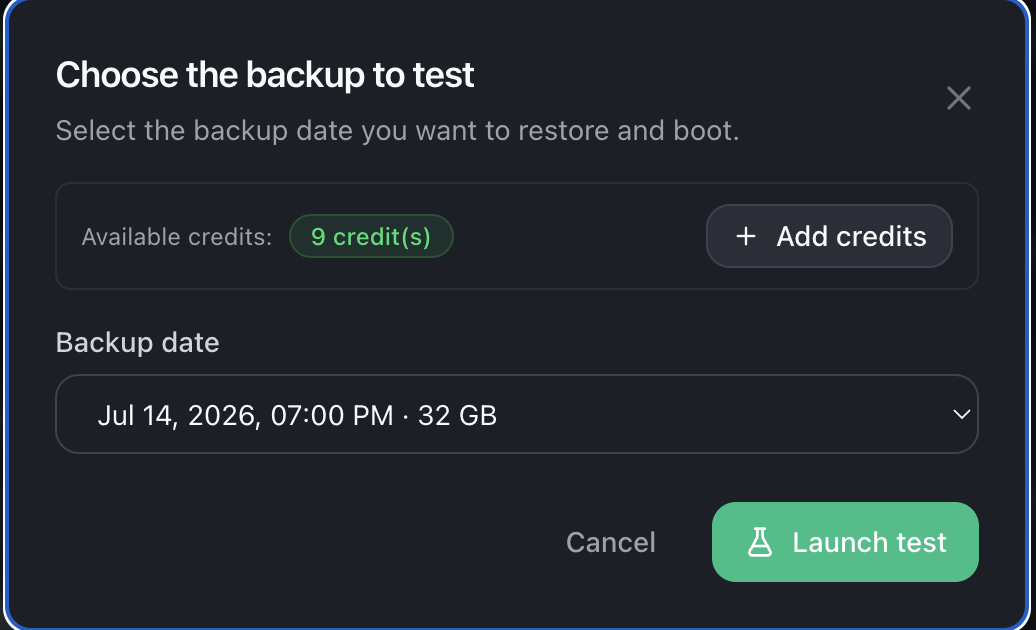
- In the dialog, choose the backup date (snapshot) to restore, then confirm. Your credit balance is shown here, with a shortcut to add more if needed.
- The test starts. You can follow its progress through the statuses:
queued→mounting→restoring→booting→success(or a failure status). If the infrastructure is busy, the test is queued and starts automatically as soon as a slot frees up; you are notified when it completes.
Read the results
Open the Results sub-tab to see every test and its outcome.
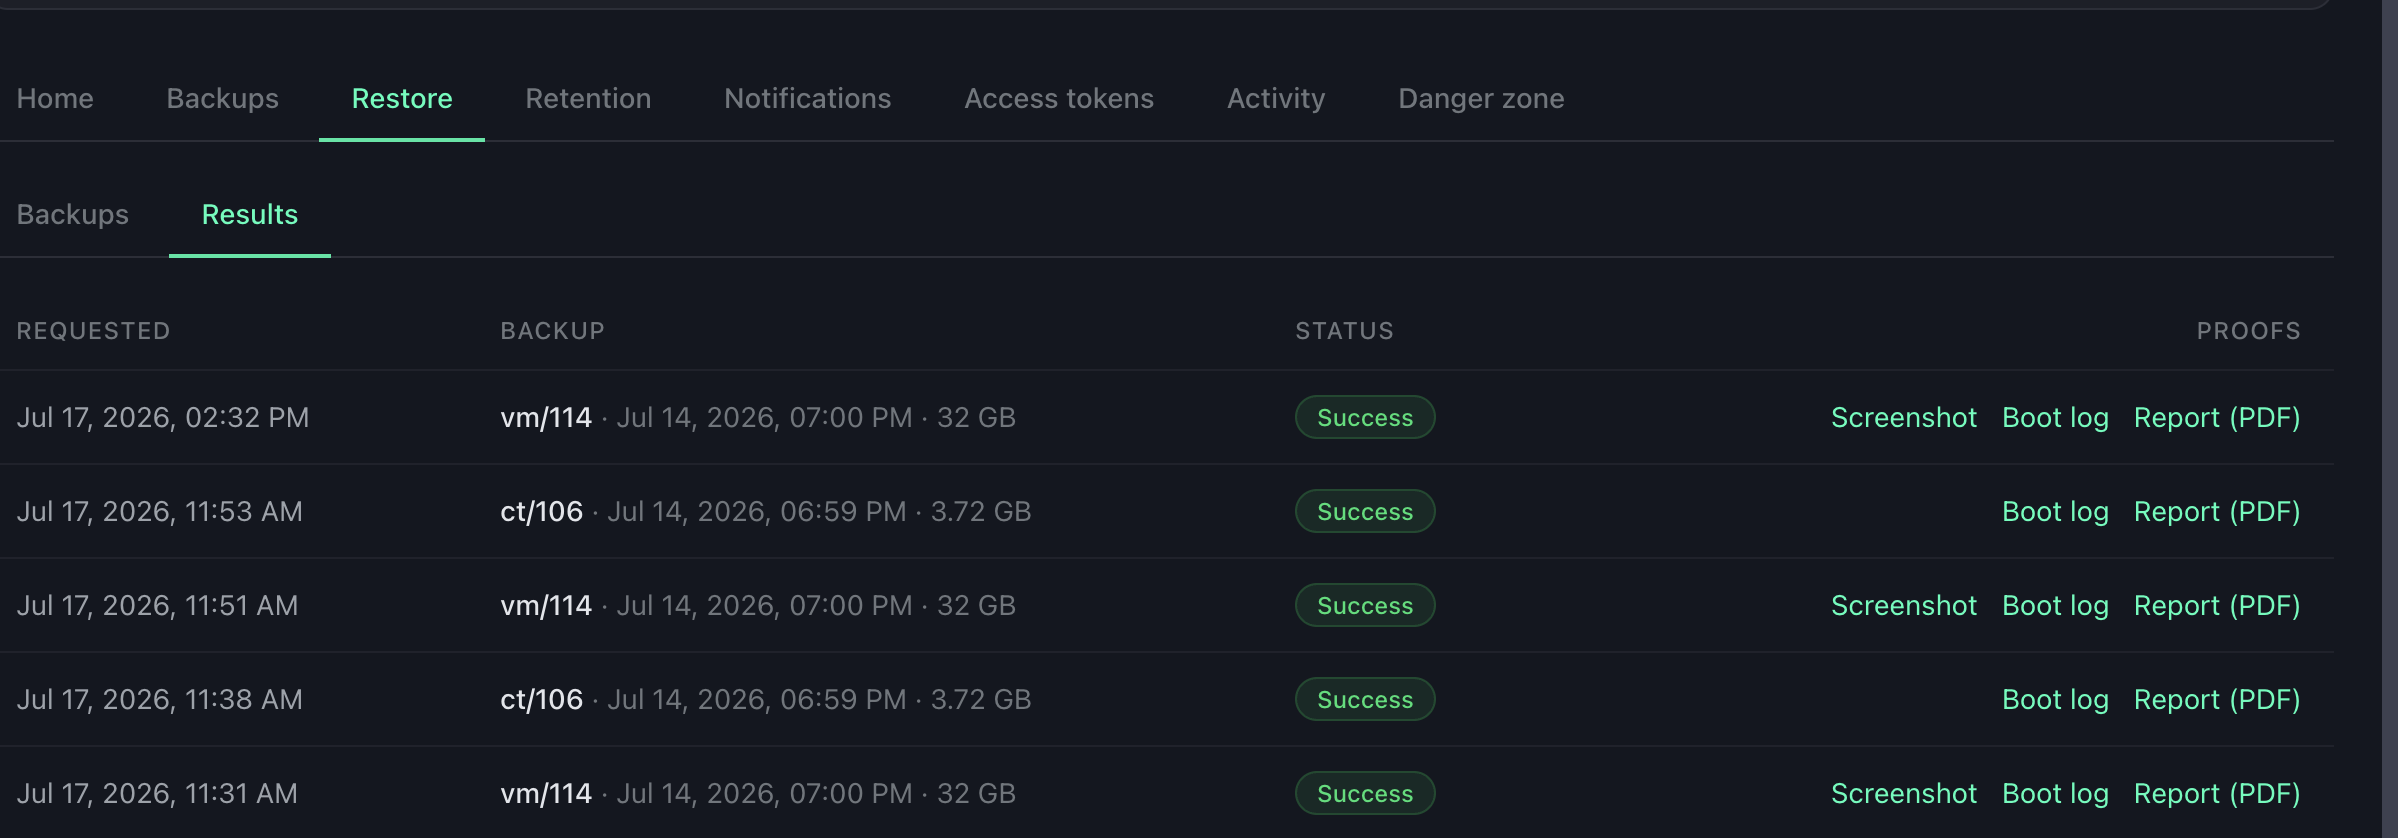
For each completed test you get up to three proof artifacts:
- Screenshot: an image of the booted machine, showing it reached its login prompt or console.
- Boot log: the guest’s boot journal, captured from inside the machine via the serial console and the QEMU guest agent.
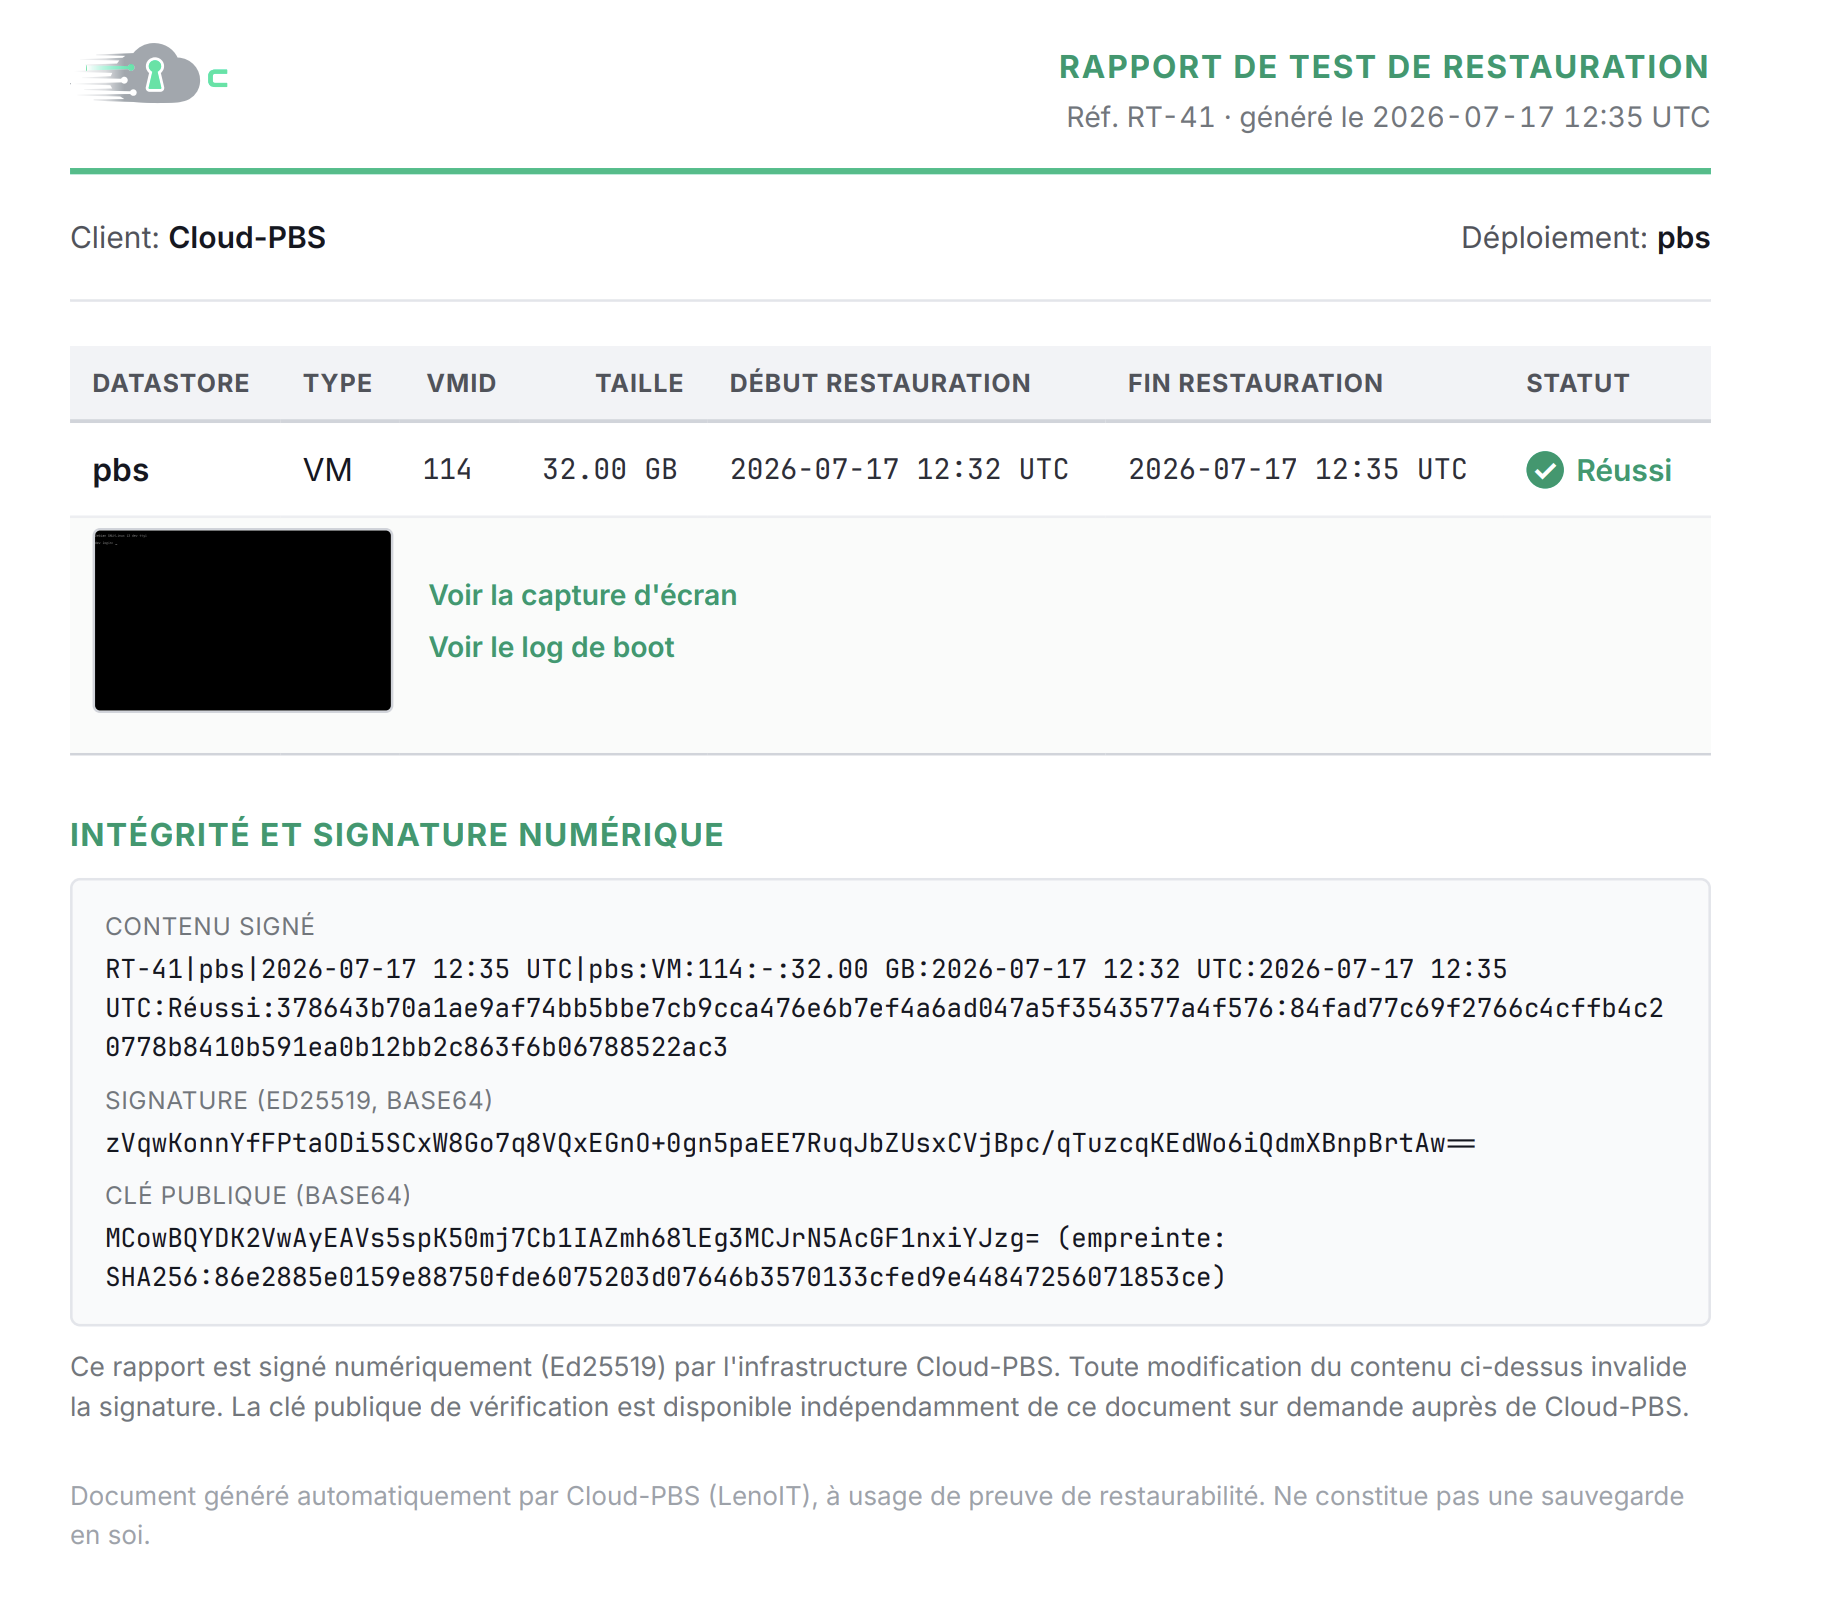
- Report: a signed PDF summarising the test (datastore, snapshot, result, timestamps) with a cryptographic signature, so it can be kept as tamper-evident proof for audits.
Click any of these links to open the artifact in a new tab.
LXC containers have no screenshot. For containers, a screenshot cannot be captured today, so a restore test on an LXC produces a boot log (and the report) but no screenshot. This is expected and does not indicate a failure. Virtual machines produce both a screenshot and a boot log.
Adding credits
Each restore test costs one credit. To top up:
- Go to Billing.
- In the Restore Credits card (shown below the invoices), click Buy credits.
- Choose how many credits to buy. The volume discount is applied automatically, then complete the Stripe checkout.
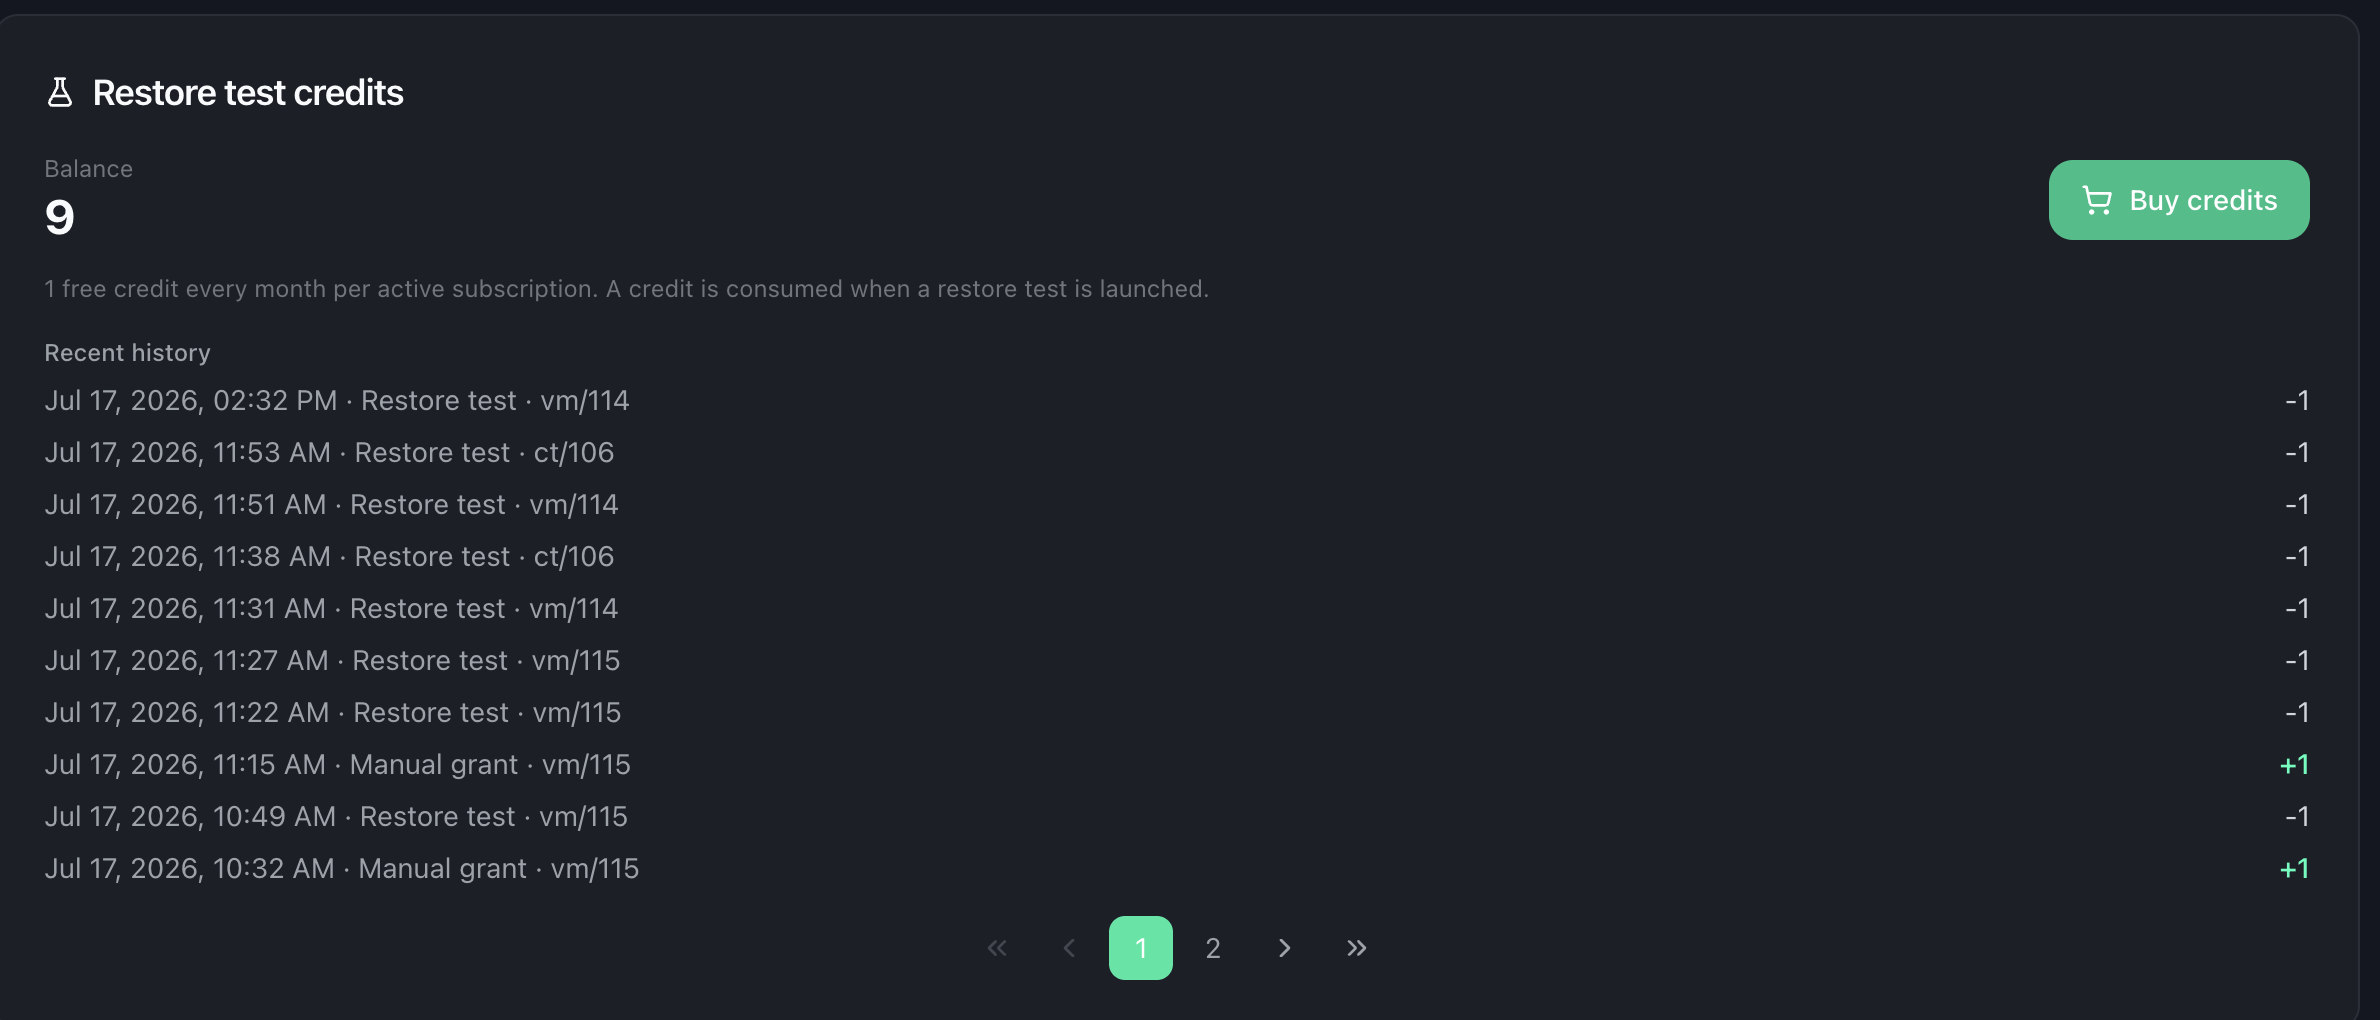
Your new balance and every credit operation (purchase, monthly free credit, consumption) appear in the credit history under the same card.
Pricing
Credits are billed per unit, with a volume discount applied automatically to the whole order:
| Quantity | Price per credit |
|---|---|
| 1 to 10 | €4.99 |
| 11 to 20 | €3.99 |
| 21 to 30 | €2.99 |
| 31 and above | €1.99 |
One credit = one restore test. Credits do not expire.